Mini Mayhem boys clothes

Monthly wrap up: October


October you were just superb!

A sneaky kid free trip to Bali, some sailing and of course, Halloween!

But the second November rolled around, the shops were filled with Christmas and now I'm starting to freak out!!

Monthly wrap up: September


Social media was a bit light on this month with lots of exciting wedding festivities for gorgeous friends, our own wedding anniversary and lots of great island living.

But so much excitement just around the corner with a sneaky Bali trip on the horizon!

Monthly wrap up: August


I am a huge fan of August with so many people I love being born in this month.

There have been plenty of celebrations around here but now it's time to move on Winter - bring on Spring!!

Princesses, Knights & Dragons fourth birthday party


What other kind of party would our sweet little pea want than a princess party of course!  Well, she asked for a Frozen party first but that was never going to pass muster with me.  I successfully negotiated to extend the theme to Princesses, Knights and Dragons to keep the boys happy and then got to work on another low key, laid back birthday party (ha ha ha!).

This party was the first one we have had with a nice big yard so I crossed my fingers and hoped for good weather.  I wasn't disappointed, with one of those glorious winter days that aren't really that cold and with not a cloud in the sky.

I took full advantage of the yard by setting up a bunch of carnival games to keep the guests entertained - feed the dragon (throwing beanbags through the mouth of a cut out dragon), crown toss (quoits with crowns instead of hoops) and knock em down cans.  I threw in a bit of craft with making crowns and tiaras out of gold pipe cleaners, colouring in, twirling ribbons on sticks and blowing giant bubbles (that popped a little too quickly).  

The kiddos had a blast tearing around working all that sugar off.  After about two hours when they started to melt down a bit we made balloon swords and sent them home with goody bags of homemade play dough, stickers and a few lollies.  

In my usual fashion I ordered a simple sponge cake from Coles went ridiculously over the top with a Princess castle made from about 2kg of icing.  I'm getting to be quite the dab hand at this so I've figured out how to cheat a little and cover cardboard rolls and ice-cream cones to make the turrets.  They say the devil is in the details and it all really came together with the many little flowers, vines and bushes as well as the stone path across the moat.  Eve said she wanted a princess and a dragon on there too but I have to draw the line somewhere so I told her they were inside sleeping.  

Another successful party done and dusted.  As usual I cracked jokes about going to McDonalds for our next birthday party but I know I'm not fooling anyone.  Now time to get the thinking cap on for Ol's 7th birthday party.  


Monthly wrap up: June


Oh June, you rocked that tune!

But you nearly broke me with your end of financial year shenanigans.  Now it is July, Eve's birthday month, so a tonne of crafting will be happening around here and a mountain icing needs to be turned into a birthday cake.  Sucker for punishment much?

Room inspiration: filing cabinet desk


How fantastic is this simple idea?

Upcycle a couple of old filing cabinets with a wide plank of wood for the perfect desk space for homework, craft and drawing.   And just imagine all the junk they could cram into those big drawers!


Source: Unknown via Pinterest

Monthly wrap up: May


Well May, you've been more than okay.  

Camping, Mother's Day, nesting in our newish pad and catching up with friends in the sunshine.

So June, will you make me swoon?

Makers we love: Sack Me


Fancy having a snooze in a sundae?  Or Hanging out with a mob of shady vegetables?  

Relative newcomer Sack Me has burst onto the children's bedding scene in a big way.  You've probably spotted their designs in just about every publication on the market from Women's Weekly through to Delicious with their whimsical take on everyday objects.

The brainchild of Li-Ann, a former architect turned graphic designer and mother to two identical twin boys (respect!), Sack Me is now being stocked across Australia, New Zealand, Singapore and the United States.  

Head over to their online store to peek at their gorgeous range of bedding, bean bags, cushions and wall decals.  But try not to be too disappointed that the sundae sheets don't come in a queen size yet!


Mum's the word: my Mother's Day wish list


It's Mother's Day next weekend.  

Since I've only just bought myself a new pair of fluffy slippers and a leopard print dressing gown, I thought I might need to give the husband and kids a few suggestions to kick things off.  

I'm not really expecting a great gift grab - a handmade card from the kids, something bizarre from the stall at school (last year I got a flower shaped salt shaker!) and a little gift they've each chosen from the local shops. 

But it's always nice to let your mind wander a little...


laurablythman.bigcartel.com - Throw glitter in today's face letterpress ($50)

dandyfields.com - The big cookout picnic blanket ($90)

intothefold.com.au - Big Doug waterproof giant cushion ($200)

www.made590.com.au - Velma Dress - blue strawberries ($145)

www.kesterblack.com - Petra nail polish ($20) 

www.gormanshop.com.au - Dot dash scarf ($129)

www.eachtoown.com.au - In my garden necklace ($62)

www.tiffmanuell.com - Gold digger mini clutch ($79)

Monthly wrap up: April


Oh April, you're no fool.  

You've kept us busy with school holidays, lazy Bali days and hanging out with some of our favourite people.  

As soon as I finish scarfing the last of the Easter eggs tonight I'll be looking forward to seeing what May will bring.  

Movie: We love Bali

Some of you already know how much we love going to Bali.  Gorgeous beaches, hot weather, delicious food and lots of fun days together as a family.  What is not to love?

We were lucky enough to have a visit over Easter and as you all know, I can't resist making a little family flick of all the fun.  Click on the link below if you'd love to check out what we got up to...


Monthly wrap up: March

March was a great one for the Mini Mayhem crew.  We settled some more into our new home (no more packing boxes to be seen!) and then jetted off for a fabulous trip to Bali.  Such a fun month.  I hope you had a good March too.

Books we love: Stuck


We LOVE love LOVE Oliver Jeffers.  Not just because he has an awesome name like our Oliver.  I've told you before how much we love him, like here.  So I thought I'd share another great book of his that we love.

Basically it is about a kid called Floyd.  Now Floyd has a small problem.  So he throws everything at it.  Literally.  Floyd's efforts at getting his kite out of a tree are laugh out loud funny and just when you think he has finally figured out a solution Floyd just goes and throws you (and everything else)!

Don't just take my word for it though, click on this link below to see the great man himself reading a short version of this story.  Such a good one.  I hope you enjoy it too. 


Room inspiration: The lion, the witch and the wardrobe


What child didn't dream about secret passage ways into hidden worlds?  A magical place to escape to.

This shot (from Pinterest) reminds me of all my childhood wishes.  It may not take you to Narnia but any kid would be pretty stoked with what appears to be a plain and simple wardrobe that gives way to a secret tunnel to a room for them to play in.  

I know my kids would go completely bonkers for a hidden room like this, just for them.  You know what I would love about it?  Shutting that door and hiding the utter toy chaos that it would contain. Now that is my kind of escapism!


Tutorial: how to paint glass louver windows


There is a place I love in Bali called Sea Circus.  Think mojitos and delicious ceviche as well as a truly gorgeous little fit out.  One of the sweetest bits is the brightly coloured glass louvers that run along the front of the restaurant.

Not happy just to get my coloured glass fix while on holidays, I wanted to bring this little pop of colour back home.  We have a panel of glass louvers in our bathroom that were a little on the m'eh side.  I was contemplating having some coloured glass cut when suddenly inspiration struck - why can't I just paint the glass??


Within an hour I had some gorgeous painted glass louver windows, thanks to a couple of ingredients that most of us would have already in the house.

Do you want to spruce up some glass at your place?  Then you will need:

- clear craft glue
- a paintbrush
- food colouring
- water
- a small bowl


I don't have a strict formula for how to mix the "paint" but as a general guide I used about a tablespoon of glue to three to four drops of food colouring and up to a teaspoon of water.

Then I just mixed it together before painting the mixture onto the glass pane.  My first attempt was a little too runny and resulted in a few streaks and drips.  After that I reduced the water by a little and in no time at all I had my whole panel of louvers painted.

I was over the moon with the result.  For zero dollars and less than an hour I had my very own slice of Sea Circus at home.  Now if I only someone could bring me some ceviche and a mojito or two!


But what if you are renting and still want to paint your windows?  Or perhaps you're just not sure if brightly coloured windows are the look you'll be crushing on in 12 months?  Worry not, this isn't a permanent fix - the glue will just scratch or wear off.  Here is a shot of one of the louvers that I wanted to redo.  It was the first one I did and had a few streaks on it.  Just a quick rub of my thumb over the dry (by a few days) glue and the original glass was revealed.  

Obviously check your own windows before painting all of them in case the layer of dust and dirt on mine provided a different result.  


Monthly wrap up: February


Oh February, you were so busy and so quick that I nearly forgot to do an end of month wrap up. 

You were the month that our happy little family moved from our home of over four years to our new place.  I can't believe how much harder it was to move than I ever expected.  But as we sat here each night this weekend on our new back deck, sipping bubbles with lovely friends while the kids ran around their new yard, it was all finally worthwhile.


Books we love: Leonardo the Terrible Monster


Leonardo is a terrible monster.  He just isn't as scary or as weird as the other monsters and no matter what he does, he just can't scare anyone.  Until he meets a little kid called Sam and scares the tuna salad out of him.  Leonardo then realises that he doesn't mind being a terrible monster if it means that he can be a good friend.

Written by Mo Willems (who has a bunch of other fantastic books that we adore as well), this book is a great story of how it is better to be a friend to someone than to be a terrible scary monster, well most of the time.

This book has made a lasting impression in our little family with the expression "scare the tuna salad out of you" making its way into our vernacular!

You can check out the story below...

Monthly wrap up: January


It's been pretty hectic around here.  We had Ollie's 6th birthday (which is always a low key and understated affair!!), my 37th birthday and a whole lot of getting ready to move house.  

I'm exhausted! I hope you've all had a super month too.

T

Room inspiration: going dotty at Ikea


With the amount of crap my kids drop on the floor each and every day, I am a HUGE fan of anything that helps me to get the stuff up and out of the way.

Enter these gorgeously colourful hooks.  Now sweet little hooks have been rocking it in kiddo rooms for a while now with some great crafty options available for sale out there.  So what is it that I am loving so much about these ones?  One word.  IKEA.  

I don't need much of an excuse to jump in the car and head 30 minutes down the highway.  I could save $20 on a rug but then spend $200 on things I didn't even know I needed.  Not to mention the money spent on swedish meatballs, I mean right??

So at only $9.99 for a set of five I could totally justify a spotty space like the one above.  Well, just to keep the crap off the floor...

Science is real: Ollie's 6th birthday party

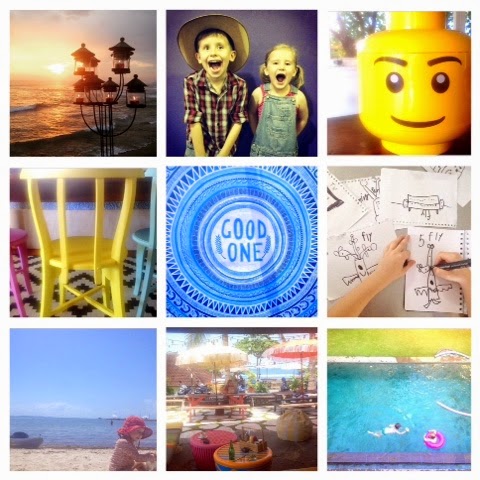
By now you all know that I go a tad bonkers for the kid's birthday parties.  I've given up apologising for this, I can't help it, it makes me happy and my kids happy so we've made our peace with it!

Ol decided he wanted to have a science themed birthday party for his sixth birthday after they had a science morning at school.  Our little guy loves experiments so I was mad keen but I just couldn't justify the pricey packages offered by local science party entertainers.  Never one to shy away from a DIY party I was pretty sure I could just buy a jumbo bottle of hydrogen peroxide and keep the kiddos amazed by myself. 

The cake was a science experiment in itself.  With gravity defying beakers of green and blue slime oozing down onto the cake, a Katherine Sabbath inspired chocolate bark explosion in the background and lots of bubbling goodness, I think I kept it pretty simple...


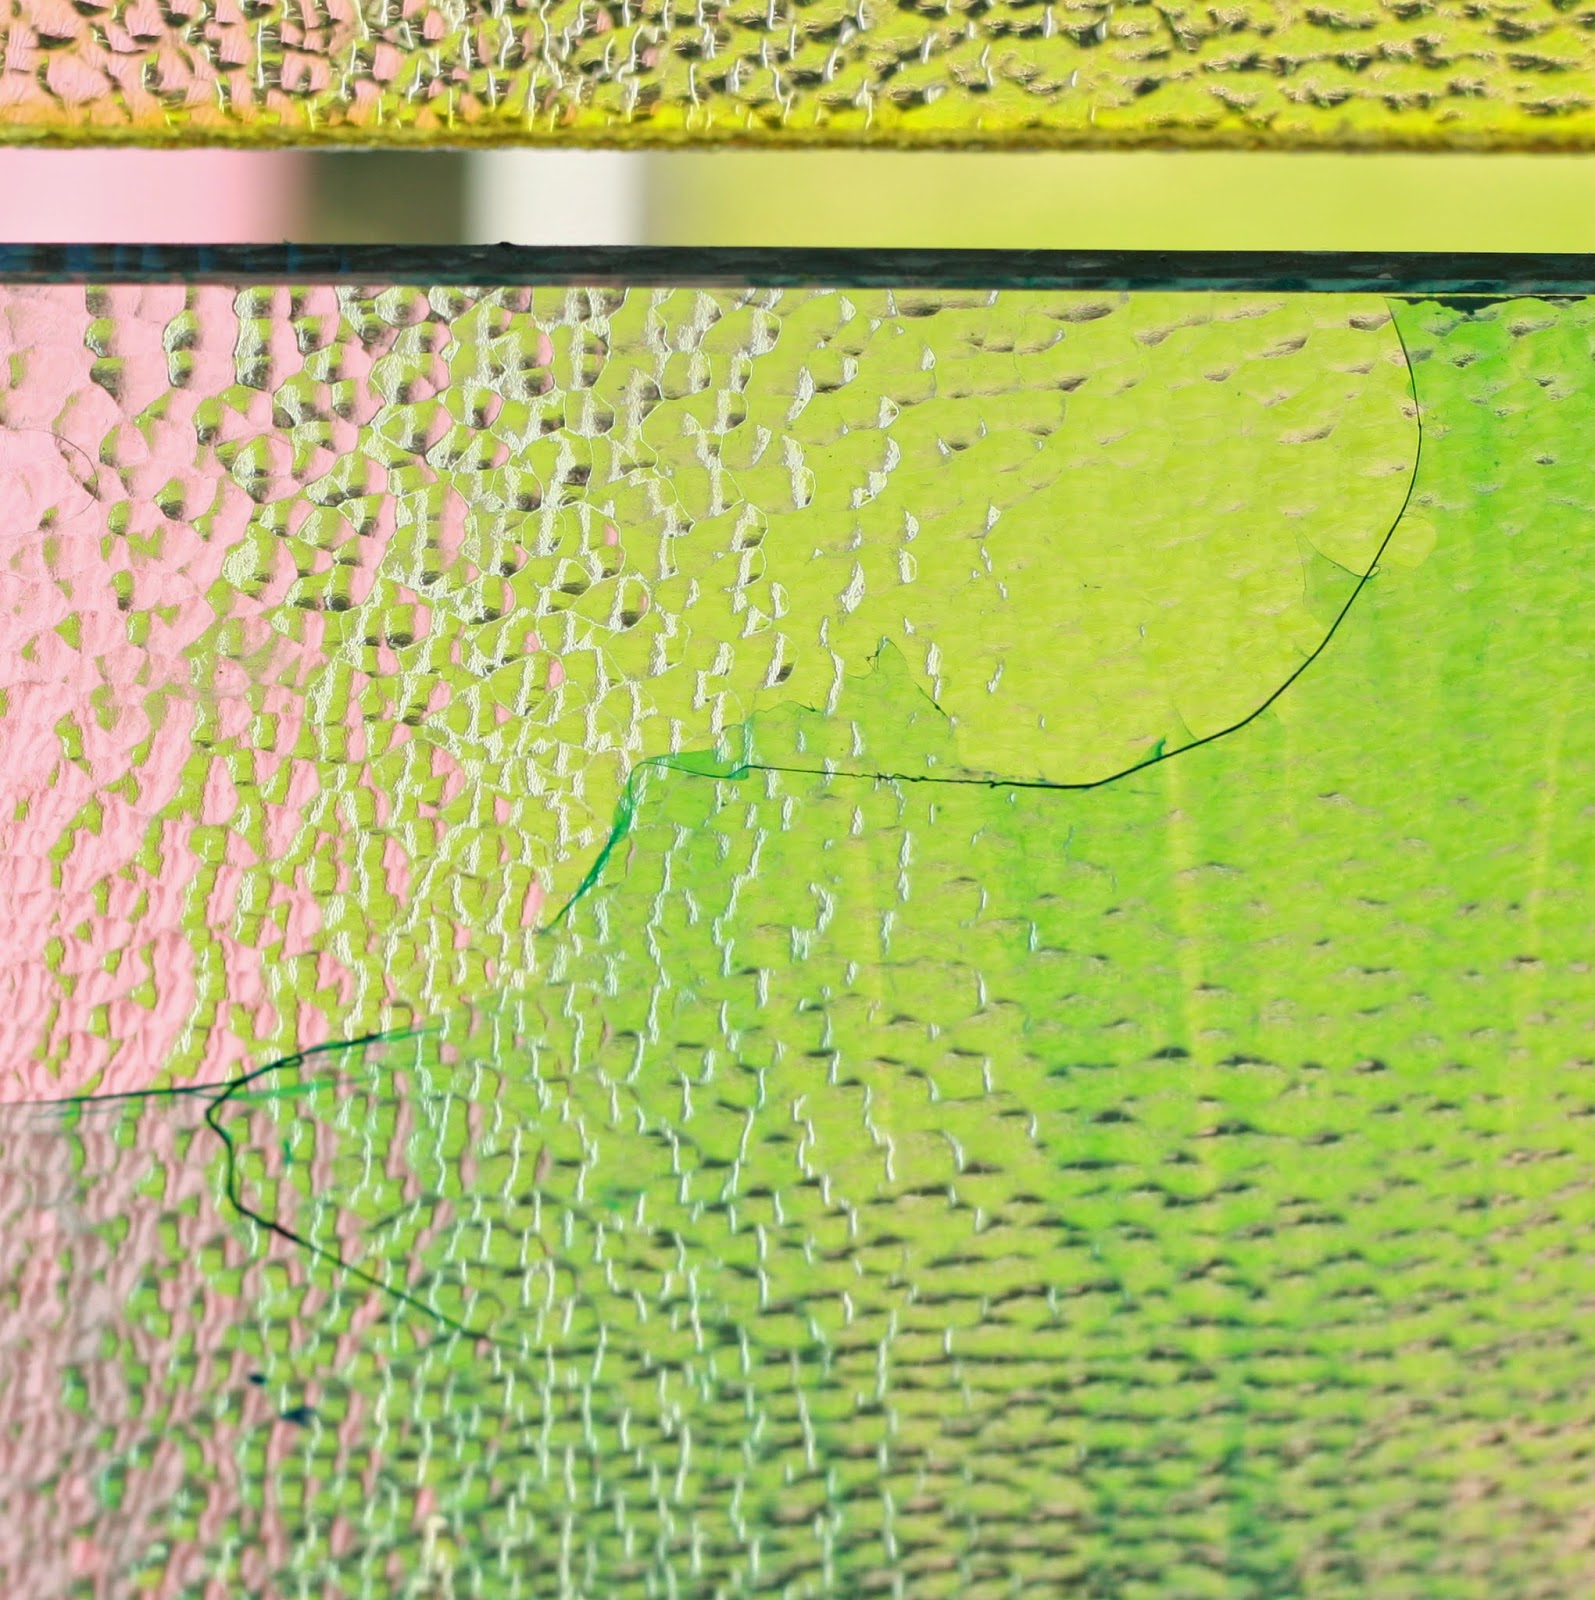
I applied a liberal dose of green across the party as it is Ol's favourite colour and naturally it is the colour of the grossest of the science experiments, SLIME!

Party bags weren't too over the top with just popping candy and a bubblegum eyeball as well as a balloon and a spinning top.  The best bit was a little book of science experiments I put together so the guests could recreate the fun when they got home.


 I tried to be as organised as I could with the experiments before the party kicked off because I knew that once I had a house of screaming kids it would be hard get it all organised.  Our fizzy balloons (see recipe below) were all set up and put out of harms way before the party started.  I also had liquids measured out in plastic beakers so they were ready to rock with each experiment.  I thought I had it all completely under control but in the madness I forgot to get the yeast for the elephant's toothpaste out of the freezer.  Thankfully the kids were too hyped to notice my quick sprint back into the house.

When it was time for our guests to arrive they found a lab coat, safety goggles and identification tags all laid out waiting for them.  The goggles and the ID might have been designed to make our guests look gorgeous in the photos (and they did!) but the lab coats were a complete necessity.  I couldn't quite believe how incredibly filthy they managed to get.


Once kitted out in their laboratory gear the kiddos hung out on the rug playing "make a molecule", which involved them making sculptures out of styrofoam balls and toothpicks.  My original plan was to use grapes but our practice run with these resulted in some seriously sticky fingers.  When you're having a science experiment party you've got to try and minimise some mess if possible.


 Soon it was time for the real fun - the experiments!

First up was ELEPHANT'S TOOTHPASTE:

- pour 1/2 cup of hydrogen peroxide (6%) into a large plastic bottle
- add 8 drops of food colouring
- add 1 tablespoon of washing up liquid and swish it around
- in a cup combine 3 tablespoons of warm water and 1 tablespoon of yeast
- mix it around for about 30 seconds
- pour the yeast mixture into the bottle and get ready for some foamy fun!


FIZZY BALLOONS

- carefully pour 1/2 cup of vinegar into a small empty water bottle
- use a funnel to half fill a balloon with baking soda/bicarb soda
- stretch the balloon over the neck of the bottle without letting any of the soda into the bottle
- ready? pull the balloon up so that the baking soda falls into the vinegar
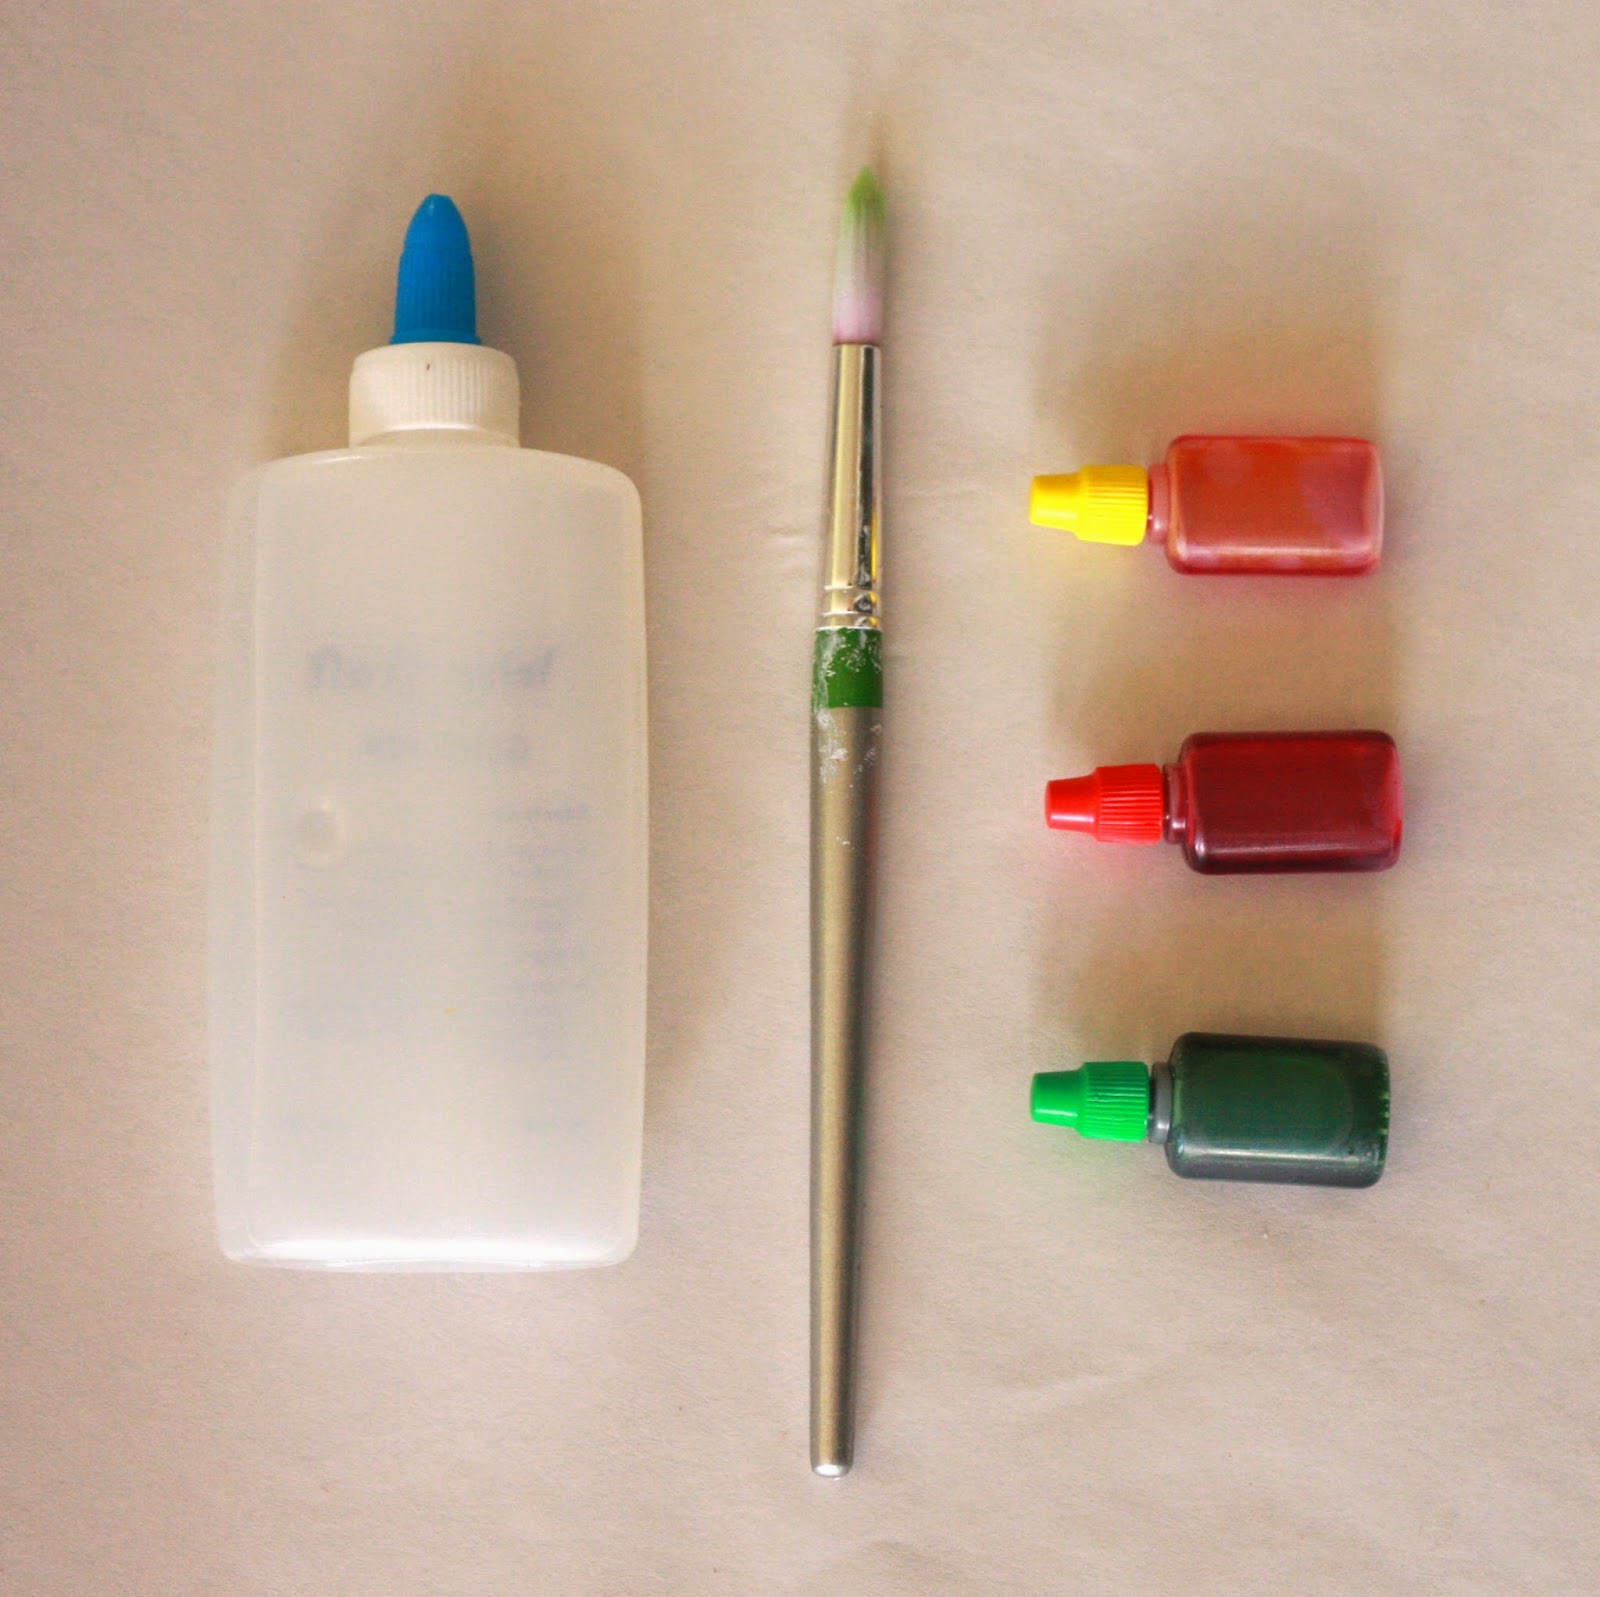

SLIME

This was the best. Not only did it feel squishingly amazing, but the kiddos got to make something to take home with them as well.

- fill a small cup with water and add a spoonful of borax and stir
- in another cup add about 2.5 cm of white craft glue
- add 4 tablespoons of water and a few drops of food colouring to the glue and stir
- add 1 tablespoon of the borax mixture to the glue and stir well
- after 30 seconds you should have some seriously goopy slime


and we finished off with our very own VOLCANO!!!!

This was only a few seconds of fun on the day but we got a fair bit of value out of making the paper mache volcano in the days leading up to the party.  Can you say school holiday project??

We tried a few different versions of this experiments with different levels of success.

Basically we made a paper mache volcano around a plastic soft drink bottle.  If you're looking for ease you can just skip the volcano and use the bottle only.

- in the bottle add a few spoonfuls of baking soda, a spoonful of water, a spoonful of dish soap and a couple of drops of red food colouring.
- when you are ready for show time just pour a cup of vinegar into the volcano and watch the eruption.


So much fun was had.  The kids loved having some real hands on silliness. Was it over the top messiness?  Hell yes!!!  I just wish we had a backyard at the time so we could have set off a bunch of diet coke and mentor geysers!!!